Half moon manicure: what it is, four ways to wear it, and how to paint one
· 5 min read
A half moon manicure leaves a crescent at the base of the nail and paints the rest. It is the French turned upside down, and one of the oldest nail looks there is — it was the everyday manicure of the 1920s and 30s, decades before the modern French tip.
What it is
The crescent follows the lunula, the pale half moon you can see at the base of most nails. In the classic version it is left bare and the rest of the nail is painted. It is also called a moon manicure or a reverse French, and it has a practical side: because the base of the nail is already unpainted, new growth shows much later than it does with a full colour.
Four ways to wear it
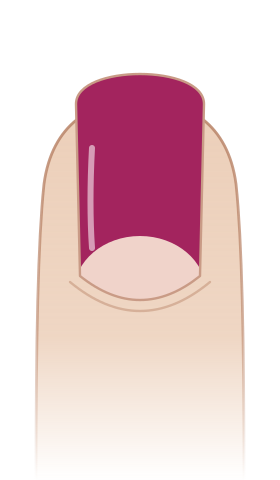
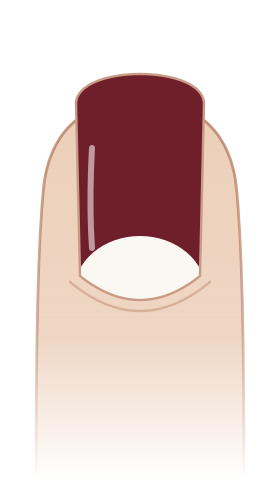
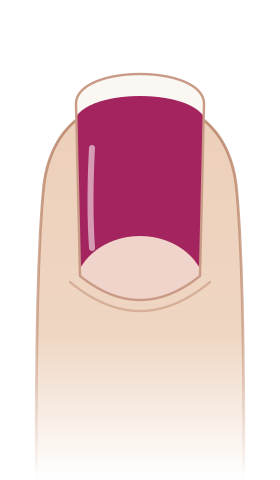
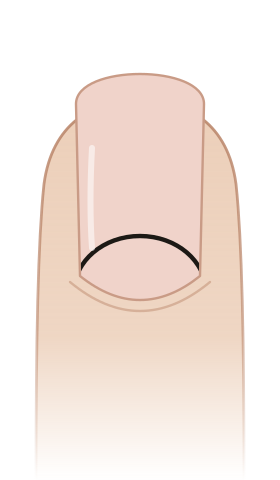
Bare moon
The classic. The crescent is left as your own nail, or a sheer base, and the colour goes over the rest. Deep and bright colours make the moon read most clearly: burgundy, red, black, a strong magenta.
Two-tone
The moon is painted in a second colour. A milky white or a metallic in the moon gives the most contrast; two shades from the same family — a dusty rose under a deep berry — look quieter and more grown-up.
Moon and tip
A crescent at the cuticle and a French tip at the free edge, so the colour sits in a band across the middle of the nail. It is a lot of detail for one nail, which makes it a good accent on one or two fingers.
Outline
Instead of a filled moon, a fine line traces the curve on a nude or sheer nail. It is the most minimal version, and the most demanding to paint.
Which nails suit it
- Longer nail beds carry a half moon most easily: there is room for both the crescent and the colour.
- On short nails, keep the moon small and low, or the colour band becomes too narrow to read.
- Any shape works, but the moon looks most natural when its curve echoes the cuticle — see our guide to nail shapes.
How to paint one at home
- Prep and base. Shape, push back the cuticles, wipe the nail clean, and paint a base coat. If the moon will be a colour, paint it now over the whole lower half of the nail and let it dry completely.
- Mark the moon. The classic trick is a round paper reinforcement sticker, the kind made for hole-punched pages, pressed onto the base of the nail so that its curve sits where you want the moon. Nail-art guides for half moons do the same job. Or paint freehand with a thin brush.
- Paint the colour from the edge of the sticker to the free edge, in two thin coats.
- Lift the guide while the polish is still wet, pulling away from the colour so the edge stays sharp.
- Clean up and top coat. A small flat brush dipped in remover tidies the curve. Seal with top coat over the whole nail.
With gel, the order is the same, curing each layer under the lamp. Guide stickers rarely work with gel, which stays wet until it is cured, so a gel half moon is usually painted freehand with a thin brush.
Try the moon first
A half moon changes how much colour is on the nail, so a shade you know as a full coat can look quite different with a crescent left out. Nail Picker puts a half moon or a French tip on a photo of your own hand, in a colour read from your own swatch, and the style can differ from nail to nail — so you can see the moon on your nail beds before you paint it.
