French manicure: every kind of French tip, and how to choose yours
· 7 min read
A French manicure looks simple: a sheer base and a white tip. But the line between the two decides almost everything — how long your nails look, how clean the finish reads, and whether it suits your hands at all.
What a French manicure is
A classic French has two parts. The base is a sheer pink or nude that evens out the nail bed without hiding it. The tip is an opaque white painted over the free edge — the part of the nail that grows past your fingertip. The curve where the two meet is called the smile line.
On a natural nail the smile line is already there — it is where the nail lifts away from the skin. A French follows the shape of the free edge: the colour curves round both corners and runs a little way down the sides, never straight across. Every kind of French is a decision about that band: how thick, what shape, what colour.
The kinds of French, side by side
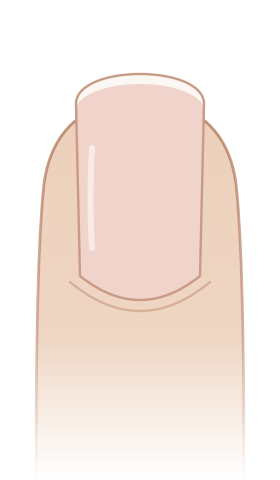
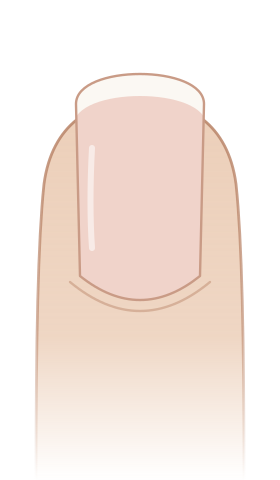
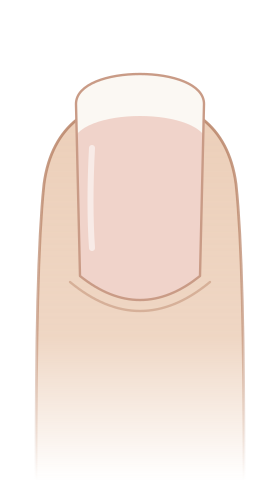
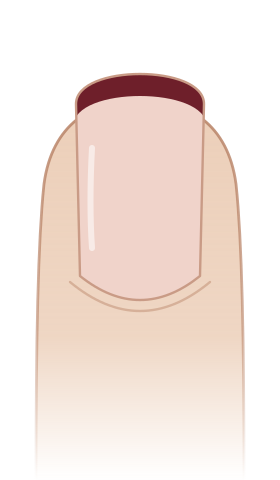
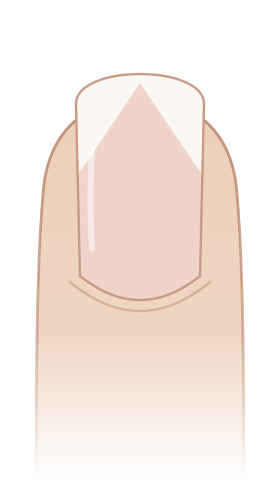
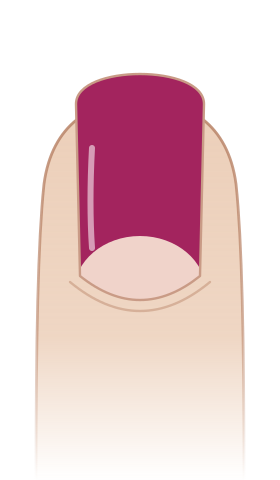
Classic
A soft white over the free edge, a sheer pink or nude base. It reads as clean rather than decorated, which is why it has outlasted almost every trend around it. The width of the white usually matches the free edge — a few millimetres on most natural nails.
Micro French
The white shrinks to a hairline along the very edge, still curving round the corners with it. Because so little of the nail is covered, the base shows almost all the way to the tip, and the nail bed looks longer. It is the most forgiving French for short nails and the most modern-looking version of the classic.
Deep French
The same curve, set further down the nail: a thicker band that covers more of the nail while still following the shape of the free edge. It is a bolder, more graphic look and works best on longer nails, where there is enough length left for the base to show. On short nails it tends to make the nail look shorter still.
Coloured French
The same shape with a colour in place of the white: burgundy, black, chrome, a pastel, or a different colour on every finger. A dark tip gives the French a sharper outline; a pale one keeps it soft. It is also the easiest way to wear a colour you are unsure about — on a tip, it is a detail rather than a commitment.
V-tip
Instead of a curve, the tip colour runs down both sides of the nail in straight lines that meet in a point near the free edge, leaving the base as a triangle pointing to the tip. The point draws the eye forward and lengthens the nail, which makes V-tips useful on wide or short nail beds. It is less forgiving to paint: a wobble in a straight line shows more than a wobble in a curve.
Half moon
Sometimes called a reverse French or a moon manicure: the colour covers the nail and a crescent is left bare, or painted a second colour, at the cuticle instead of the tip. It follows the lunula — the pale half moon at the base of the nail — rather than the free edge.


Which French suits your nails
- Short nails: micro French. A thin line keeps most of the nail as base colour, so the nail looks longer. A classic-width tip on a short nail can leave almost no base at all.
- Long nails: any of them. A deep French or a coloured tip has room to look deliberate rather than heavy.
- Wide nail beds: a V-tip or a slightly deeper curve. Both pull the eye along the length of the nail instead of across it.
- Almond and oval shapes: a curved smile line that follows the shape. On square nails a straighter, flatter line looks more natural.
- Nails that are growing out: a half moon. The bare crescent at the base hides new growth for longer than a full colour does.
Choosing the base and the tip colour
The base does more work than it gets credit for. It should even out the nail bed and sit close to your skin — a sheer pink on cooler, rosier skin, a peachy or beige nude on warmer skin. A base that fights your undertone is what makes some French manicures look chalky or grey. There is more on undertones in our guide to colours for your skin tone.
For the tip, a soft or milky white looks more natural than a stark, paper white, especially against warmer skin. If you choose a colour instead, judge it against your hand rather than on its own — a shade rarely looks on the nail the way it looks on the swatch.
How to paint a French at home
- Shape and prep. File the nails to the same shape and length — a French shows every difference between nails. Push back the cuticles and wipe the nail clean.
- Base. One or two thin coats of the sheer base. Let it dry properly before the tip, or the line will drag.
- The tip. Paint the white in from the sides towards the centre, following your smile line. A thin striping brush gives the most control. Guide stickers or a soft silicone stamp pressed against the tip are easier ways to get both sides even.
- Clean the line. A small flat brush dipped in remover sharpens the curve and fixes any wobble while the white is still soft.
- Top coat. One coat over the whole nail blends the line and protects the tip, which is the part that chips first.
Gel works the same way, curing each layer under a lamp. It gives a smoother line and lasts longer, but a gel French is harder to correct once cured.
Try it before you paint it
A French changes the most from nail to nail and hand to hand, which makes it hard to picture from a photo of someone else. Nail Picker puts a French tip or a half moon on a photo of your own hand, with the colours read from your own swatches — base and tip — and each nail can carry a different shade. It is a quick way to see whether a burgundy edge or a milky white is the one you will actually wear.